
How to use the Assigned agent feature
On JivoChat you can assign an agent to each chat. This feature allows your agents to easily identify the teammate responsible for a particular conversation.
Assigned agent will have priority in communicating with the client and will receive that client's message in the app first. It also makes it easier for the admin to analyze the clients list on JivoChat application.
This article will explain how to use the "Assigned Agent" feature.
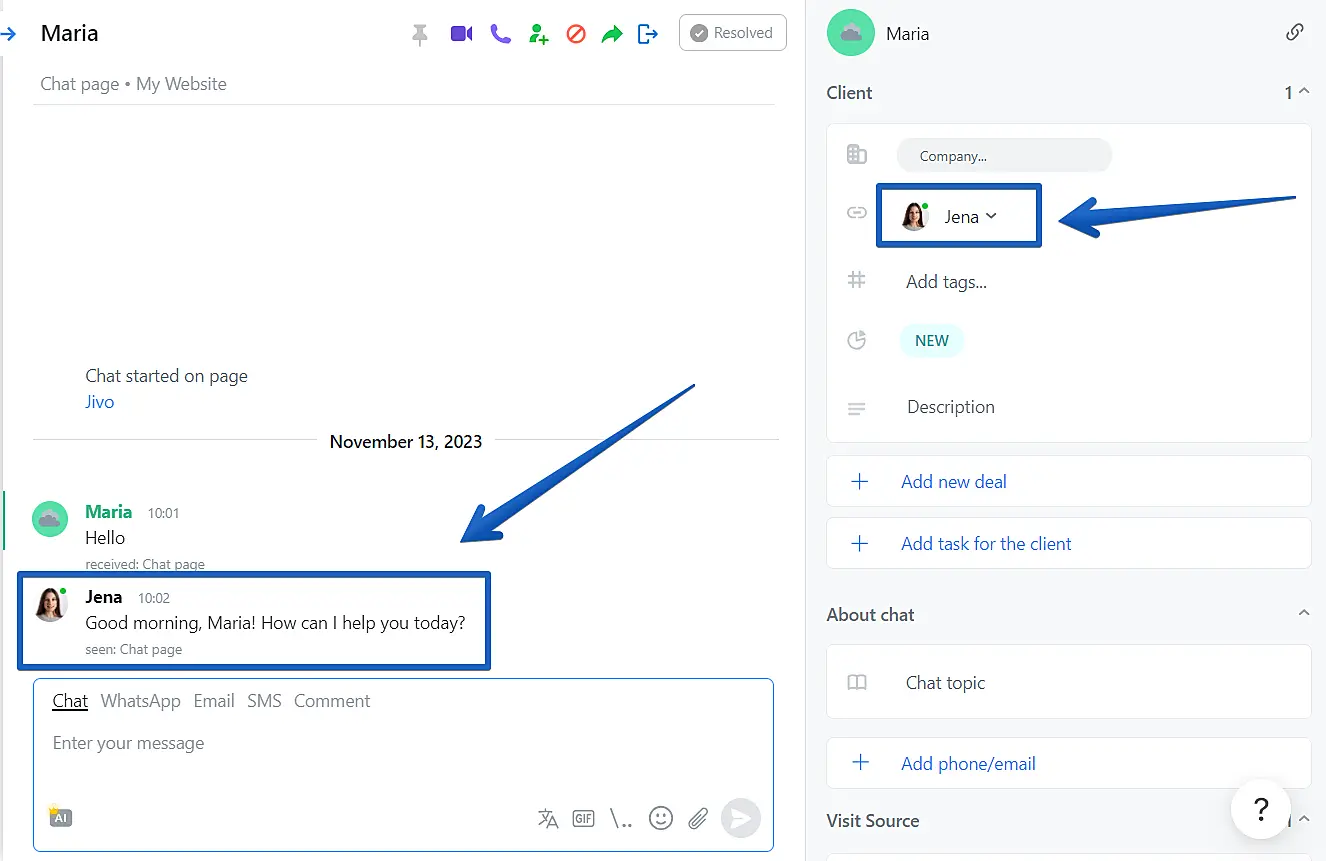
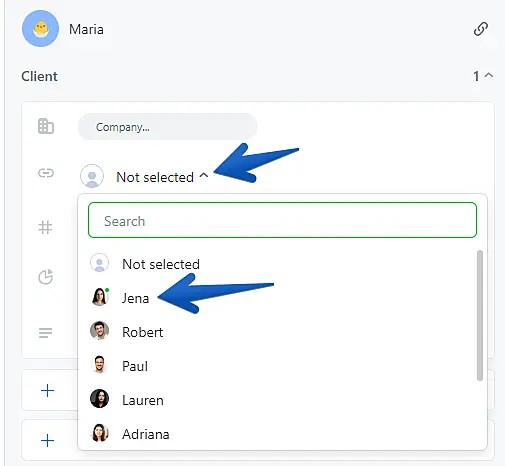
To select an agent, click on "Assigned agent" and select the agent from the drop-down list. You can search for the agent by name, position, email or phone number. To leave the chat unassigned choose the option "Not selected".
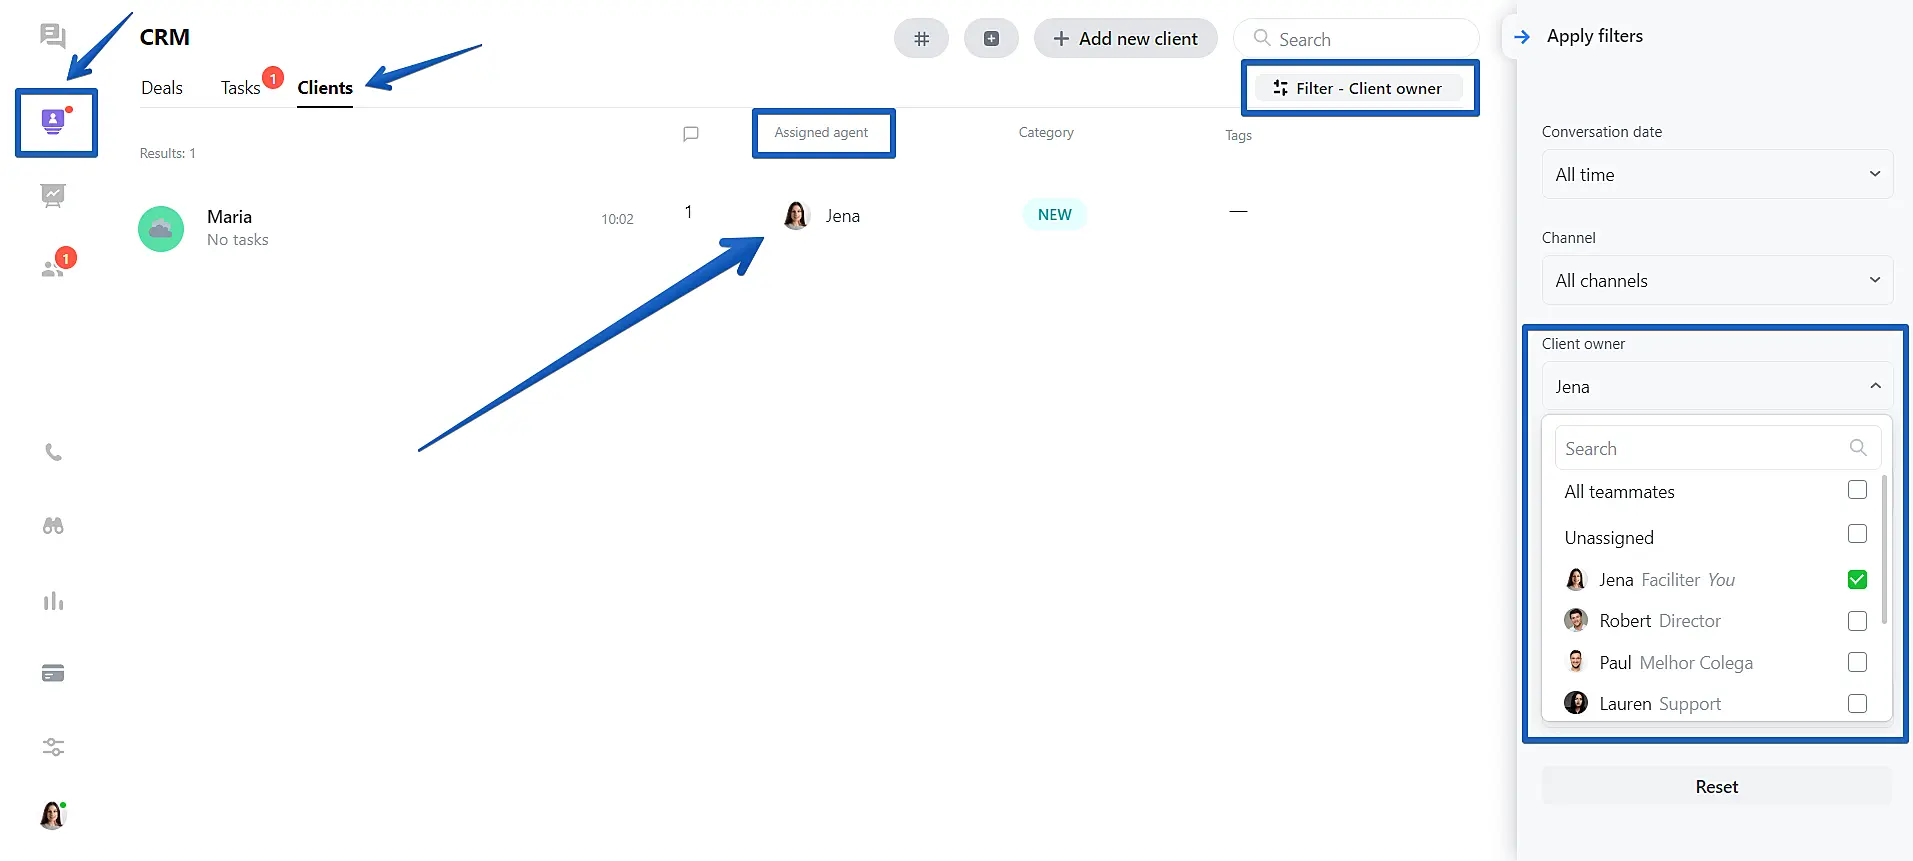
On CRM section, on Clients tab, you can filter your clients using "Assigned agents" filter. You can also download a file with clients data including the name of the assigned agent.
We wish you a productive work!

