How to install the chat code on Joomla
Method 1: Installation using the Joomla Template Manager#
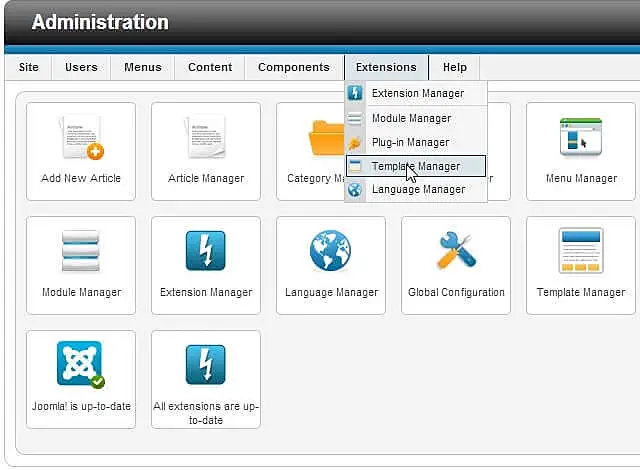
Go into your site’s admin panel, then navigate to the Template Manager.
Extensions -> Template Manager.
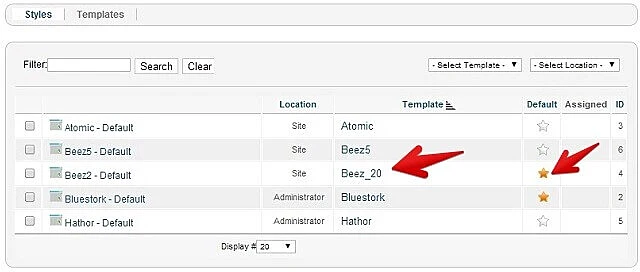
Pick the template that is used by default on your site from the list of templates displayed (it will be indicated by a gold star).
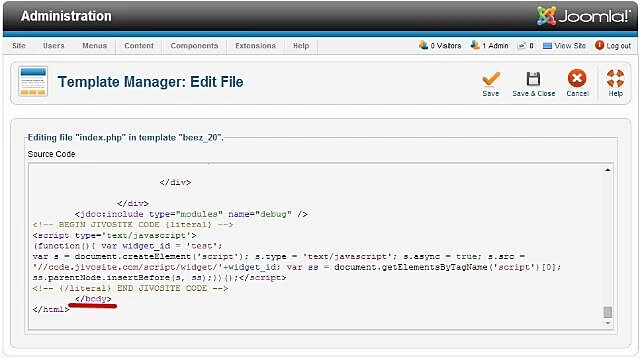
In the Template Master Files section, click Edit main page template.
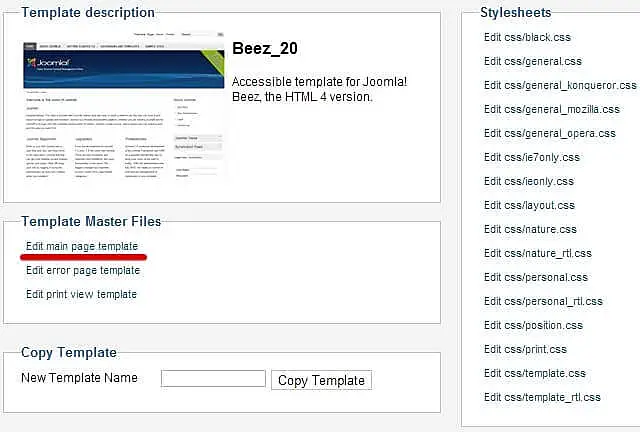
Now you should edit the main code of your site. Paste the JivoChat code before the </body> tag.
Make sure to save the settings, and you’re done!
The JivoChat code is available in the JivoChat app, in the Installation section: Manage -> Channels -> Settings -> Installation.
Method 2: Create a new module of Joomla#
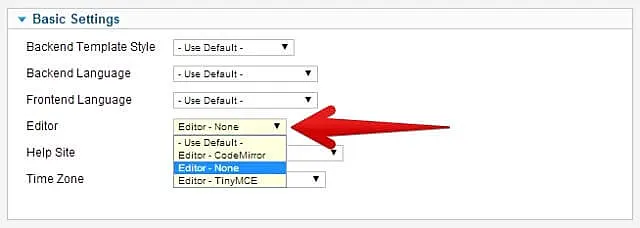
Go into your site’s admin panel, then navigate to your Profile. Site» > My Profile.

Navigate to the Editor: Basic Settings > Editor.
Then, click the drop down menu and choose Editor – None. We recommend this option because some editors install JivoChat incorrectly.
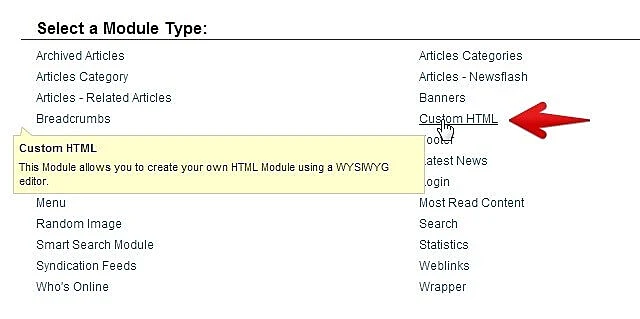
Next, go into the admin panel and navigate to the Module Manager.
Extensions > Module Manager.
Create a new module, selecting Custom HTML as the module type.
Now, go to the settings of this new module and put the JivoChat code in the Custom Output field.
Select JivoChat’s position on your website using Module Assignment: On all pages. We recommend the footer position.
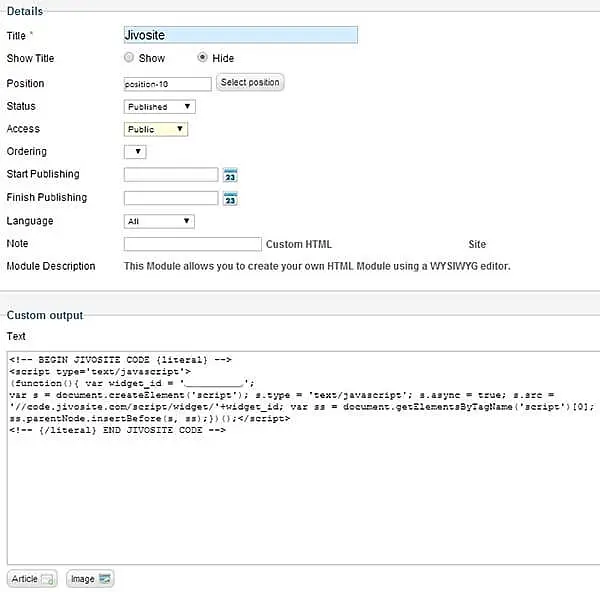
Make sure to save the settings, and you’re done!
Method 3: Installation with FTP access#
You can also connect JivoChat to your site through its source files, using an ftp-client.
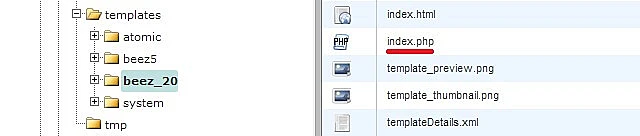
Navigate to: Templates/Your default template/Index.php and open up the index.php file.
Copy the JivoChat code and paste it before the </body> tag in the main code of your site.
Method 4: Install the JivoChat Joomla module manually#
To install JivoChat on your Joomla site, you can use our module, which is available from links at the bottom (for different versions), in the Installation section.
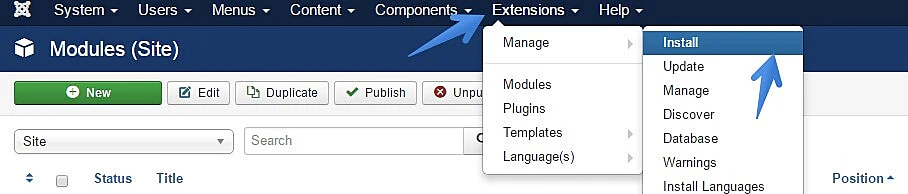
Extensions > Manage > Install
Upload the archive with the module to your CMS.
Further move to Module section where you will be able to see the Jivosite module (If it is not here, just add it).
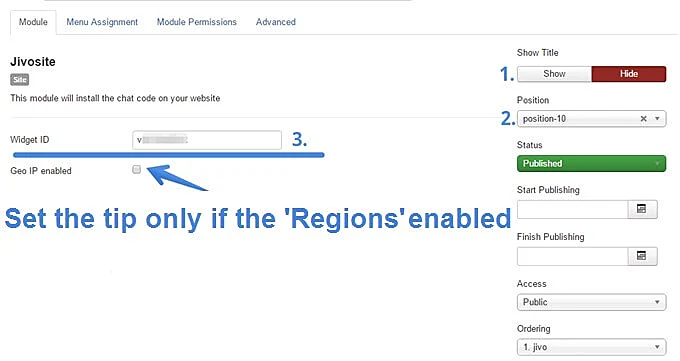
In the new module you be able to set you widget ID number, which presented into the code:
<!-- BEGIN JIVOSITE CODE {literal} -->
<script type='text/javascript'>
(function(){ var widget_id = YOUR ID NUMBER; var d=document;var w=window;function l(){
var s = document.createElement('script'); s.type = 'text/javascript'; s.async = true; s.src = '//code.jivosite.com/script/widget/'+widget_id; var ss = document.getElementsByTagName('script')[0]; ss.parentNode.insertBefore(s, ss);}if(d.readyState=='complete'){l();}else{if(w.attachEvent){w.attachEvent('onload',l);}else{w.addEventListener('load',l,false);}}})();</script>
<!-- {/literal} END JIVOSITE CODE -->
If you use the Regions feature set a tip in front of the Geo IP enabled
Note: Besides previous settings you should set ‘Name’ of the module. Also set title showing to an appropriate position (head, footer, index). The position should be connected with the site template.
Update your site page in browser and you must see the chat widget on your site.